
I made a cake for my husband's BFF's wife's baby shower this weekend. They're expecting their first baby, a girl, in July, and when I got the invitation in the mail, it took me all of half a second to know that I wanted - nay, NEEDED - to volunteer to make a cake for the shower.
Just look at this invitation by Tiny Prints. Does this not just scream "turn us into fondant sculptures!!"??
Just look at this invitation by Tiny Prints. Does this not just scream "turn us into fondant sculptures!!"??

Ok, maybe it doesn't scream that exactly, but come on, how cute!!
So I immediately got in touch with my husband's BFF's wife's BFF to volunteer my services, and lucky for me, she hadn't been planning on a cake and made space for me on the sweets table!
I don't have a vast amount of experience with fondant sculptures at this point, so I'm learning as I go. One of the big things I'm learning is that Rice Krispies Treats are crucial to maintaining the structural integrity of sugar sculptures that would otherwise be too bulky or heavy to be made purely of fondant or gumpaste. Sculptures made out of pure fondant also take an eternity to dry completely, whereas a sculpture made with a base of RK Treat and covered with a layer of fondant or gumpaste will harden up nicely over a couple of days.
Note that pure fondant will not dry as sturdy as gumpaste, so if you want your sculptures to last a while, you might want to use gumpaste only. I don't tend to buy or make actual gumpaste anymore because I frequently need only a very small amount, so instead I knead in a bit of tylose powder to small amount of fondant to get a similar effect. This is the tylose powder I use, and here is a tidy little summary of the differences between fondant and gumpaste.
We got home from our trip to northern California late last Sunday (update on that still to come), and on Monday I put together my plan of attack for the cake for the Baby Party, as Clara called it. It's hard to explain to a 2-year-old that there is a party for a baby that doesn't even exist yet, and that we call it a shower instead of a party. So Baby Party it is.
I sculpted the bases of the two bigger animals (the elephant and the monkey) on Wednesday night, and finished them all off on Thursday night, well ahead of the Sunday party so they had time to settle and dry. All of my fondant work is done after bedtimes at night. Since the girls are still small (2 and 4) and they love to help in the kitchen (which, as any parent knows, can result in chaos), I generally save all my cake decorating for bedtimes, when the kitchen is mine alone, the little people are sleeping like angels, and the other big person is watching bang-bang-shoot-em-up movies on TV. I baked the cake layers on Friday morning before the girls got out of bed, knowing I would crumbcoat the cake on Saturday at naptime and finish the decorating that night.
I used prepackaged Rice Krispies Treats for these sculptures. This turned out to be a nice change from making the homemade version, which results in more dishes and mess to deal with when you are already up to your elbows in fondant and powdered sugar.
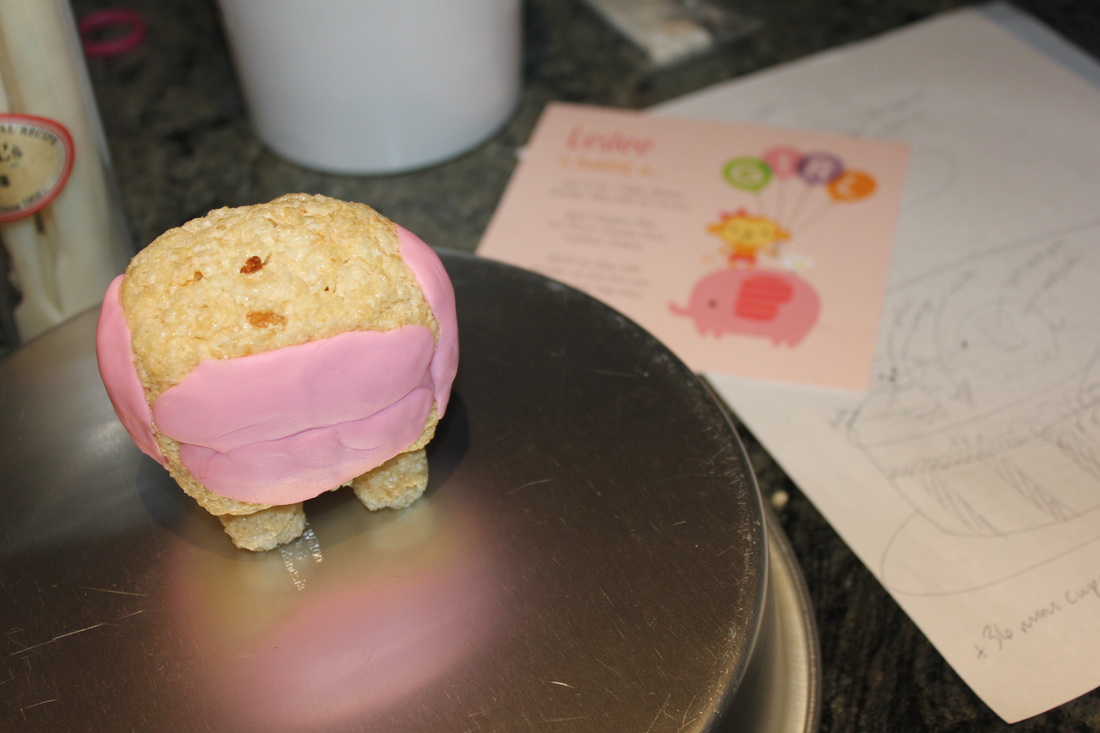
Here is a picture of the elephant at the 2nd stage of coming together. I have yet to get the hang of taking pictures at every step of the process for a tutorial, so my photos below are kind of random moments of the process when I remembered to shoot them.
In this picture, I had hand-pressed and molded two RK Treats into an oval shape of sorts for the body, and mashed a third RK Treat into little squares for the legs. I then started adding strips of pink fondant to round out the body in the places where it was a bit wonky. Definitely art, not so much science.
So I immediately got in touch with my husband's BFF's wife's BFF to volunteer my services, and lucky for me, she hadn't been planning on a cake and made space for me on the sweets table!
I don't have a vast amount of experience with fondant sculptures at this point, so I'm learning as I go. One of the big things I'm learning is that Rice Krispies Treats are crucial to maintaining the structural integrity of sugar sculptures that would otherwise be too bulky or heavy to be made purely of fondant or gumpaste. Sculptures made out of pure fondant also take an eternity to dry completely, whereas a sculpture made with a base of RK Treat and covered with a layer of fondant or gumpaste will harden up nicely over a couple of days.
Note that pure fondant will not dry as sturdy as gumpaste, so if you want your sculptures to last a while, you might want to use gumpaste only. I don't tend to buy or make actual gumpaste anymore because I frequently need only a very small amount, so instead I knead in a bit of tylose powder to small amount of fondant to get a similar effect. This is the tylose powder I use, and here is a tidy little summary of the differences between fondant and gumpaste.
We got home from our trip to northern California late last Sunday (update on that still to come), and on Monday I put together my plan of attack for the cake for the Baby Party, as Clara called it. It's hard to explain to a 2-year-old that there is a party for a baby that doesn't even exist yet, and that we call it a shower instead of a party. So Baby Party it is.
I sculpted the bases of the two bigger animals (the elephant and the monkey) on Wednesday night, and finished them all off on Thursday night, well ahead of the Sunday party so they had time to settle and dry. All of my fondant work is done after bedtimes at night. Since the girls are still small (2 and 4) and they love to help in the kitchen (which, as any parent knows, can result in chaos), I generally save all my cake decorating for bedtimes, when the kitchen is mine alone, the little people are sleeping like angels, and the other big person is watching bang-bang-shoot-em-up movies on TV. I baked the cake layers on Friday morning before the girls got out of bed, knowing I would crumbcoat the cake on Saturday at naptime and finish the decorating that night.
I used prepackaged Rice Krispies Treats for these sculptures. This turned out to be a nice change from making the homemade version, which results in more dishes and mess to deal with when you are already up to your elbows in fondant and powdered sugar.
Here is a picture of the elephant at the 2nd stage of coming together. I have yet to get the hang of taking pictures at every step of the process for a tutorial, so my photos below are kind of random moments of the process when I remembered to shoot them.
In this picture, I had hand-pressed and molded two RK Treats into an oval shape of sorts for the body, and mashed a third RK Treat into little squares for the legs. I then started adding strips of pink fondant to round out the body in the places where it was a bit wonky. Definitely art, not so much science.
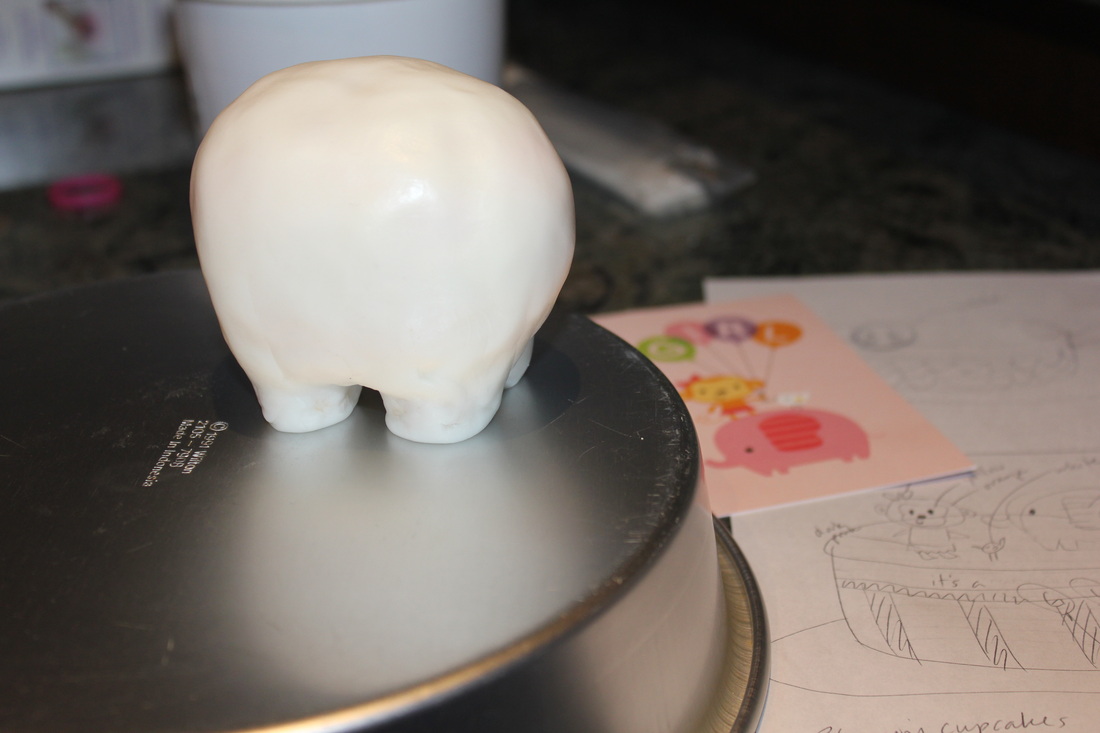
I then realized I was short on pink fondant, so I switched over to some leftover white to cover the entire shape as a base coat to even out the bumps.
After lots of molding and shaping, here is the base layer of white fondant on the elephant's body. Note there are still bumps and lumps showing in this coat, which I evened out with the final layer of fondant.
After lots of molding and shaping, here is the base layer of white fondant on the elephant's body. Note there are still bumps and lumps showing in this coat, which I evened out with the final layer of fondant.
I left that white body to dry overnight, and then on Thursday I molded on a second coat of pink fondant. In retrospect, I should probably have added a bit of tylose powder to this layer of fondant, as it kept denting ever so slightly by the pressure of my hands whenever I picked it up.
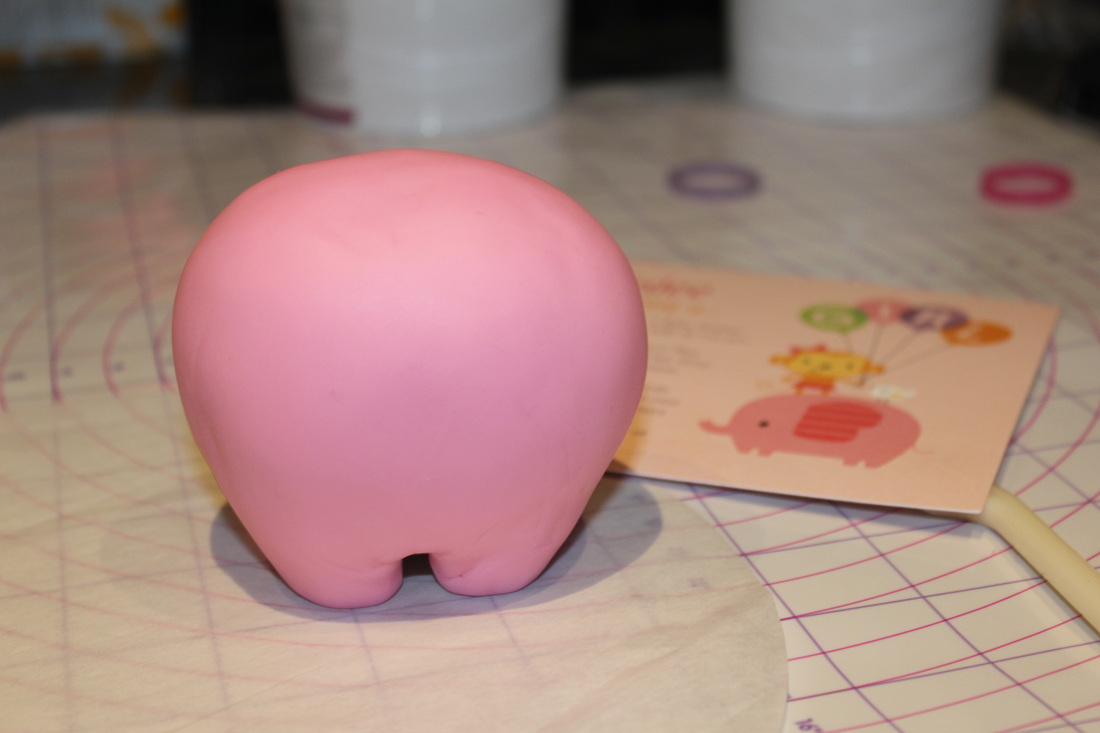
Of course the shape of the legs varies from the invitation image, but for me that was kind of unavoidable since I didn't want the whole thing to collapse on itself.
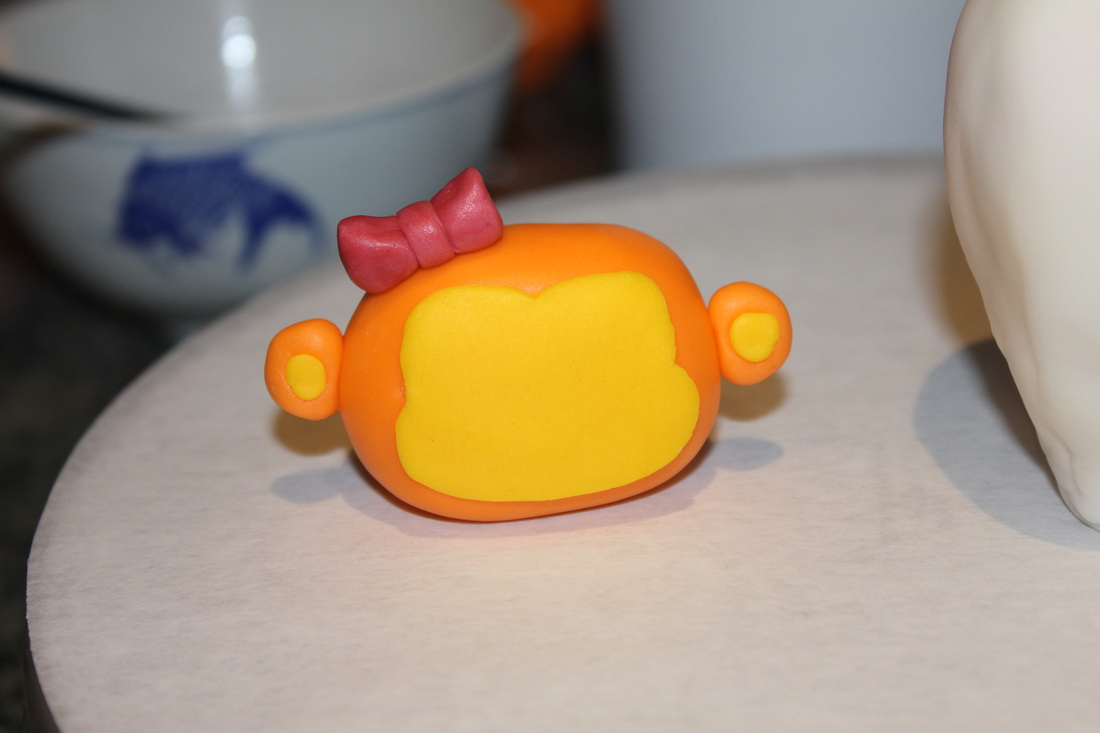
Next came the monkey and the little bird. I gave the monkey an RK Treat core for her body so her heavy gumpaste head didn't sink into her body (again with the structural integrity). I made her head on Wednesday night, left it to dry overnight, and finished her off on Thursday.
I free-hand cut out her yellow face shape with a sharp kitchen knife, and I just use a small (food-use-only) paintbrush with water as my "glue". I don't bother with edible glue or gum glue or anything like that, but then again, my sugar art is pretty basic and maybe edible glue is important for more delicate work, I don't know. Ron Ben-Israel I am not.
Here is the monkey's faceless, decapitated head before I drew her face on with a black Americolor food coloring marker.
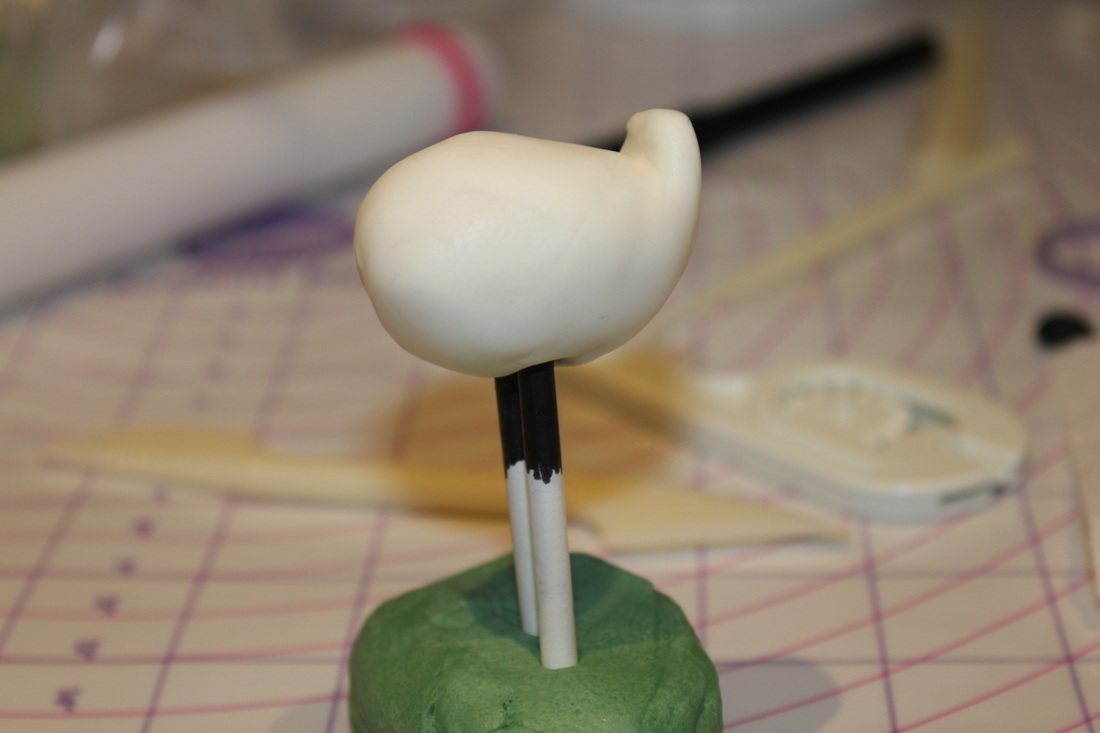
The little bird also had an RK Treat core, and I used white lollipop sticks for her legs, which I colored black with the same Americolor marker and stuck into this green fondant blob to dry.
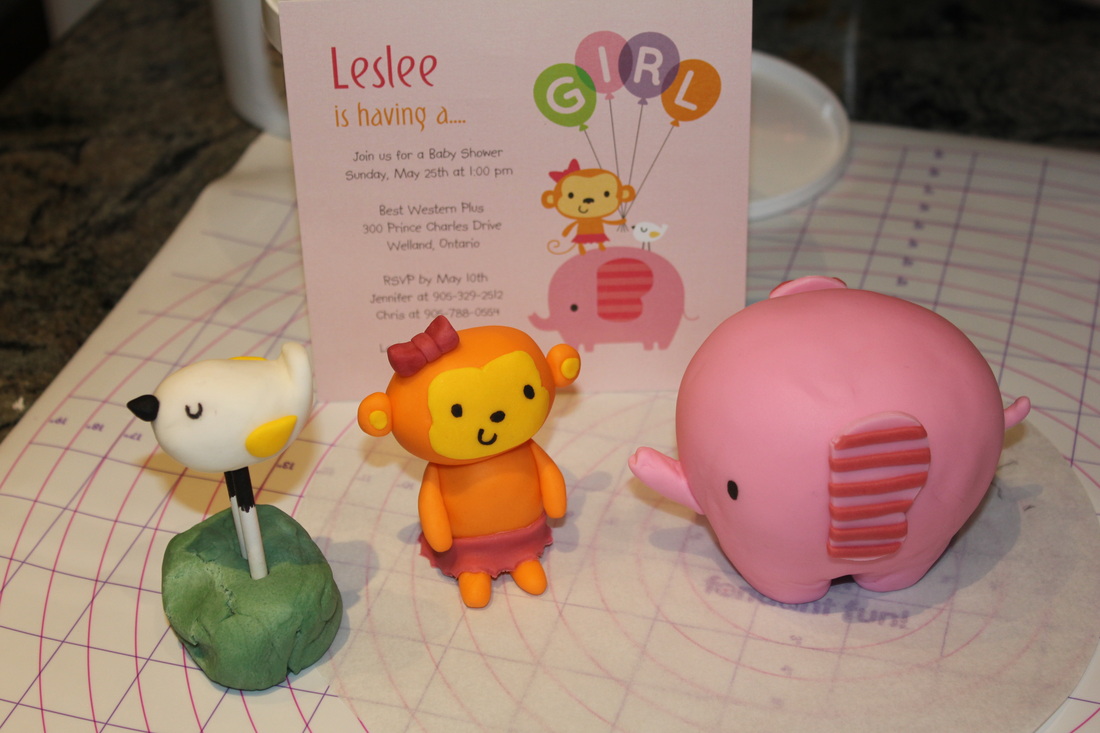
After adding some final details, here are all of three animals in their final state, along with the party invitation image they were inspired by.
Once these little guys were done on Friday night, the rest was a piece of cake, pun only semi-intended. I had baked the cakes on Friday, so on Saturday during Clara's nap, I crumb-coated the cake in the pink buttercream I had made that morning, and I laid the fondant on after bedtime that night.
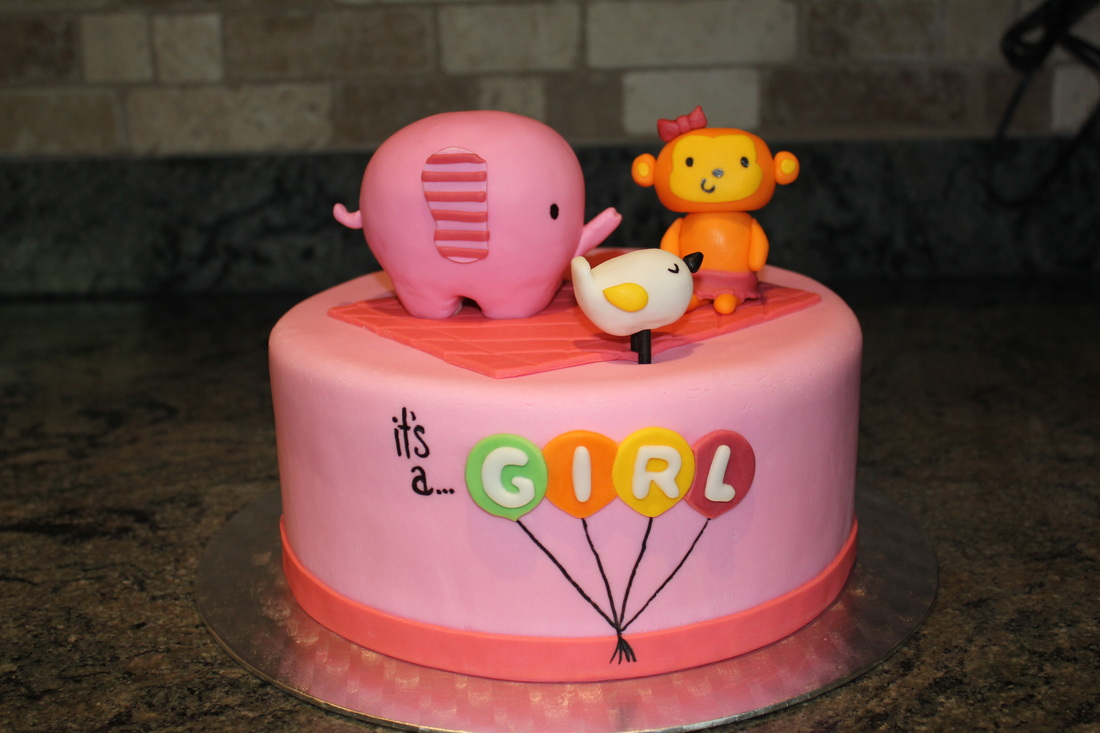
I thought these little guys would look cute on a baby blanket, so I imprinted a bit of quilting on a square piece of fondant by pressing the dull edge of a bread knife in a diagonal pattern before placing it atop the cake.
A few more details with that über-useful Americolor marker, and there you have it!
The mommy-to-be's BFF was also short some mini cupcakes, so I was happy to whip together these little vanilla mini-cuppies topped with sweet strawberry-vanilla buttercream. The pink-and-gray jungle theme at this shower was just adorable!
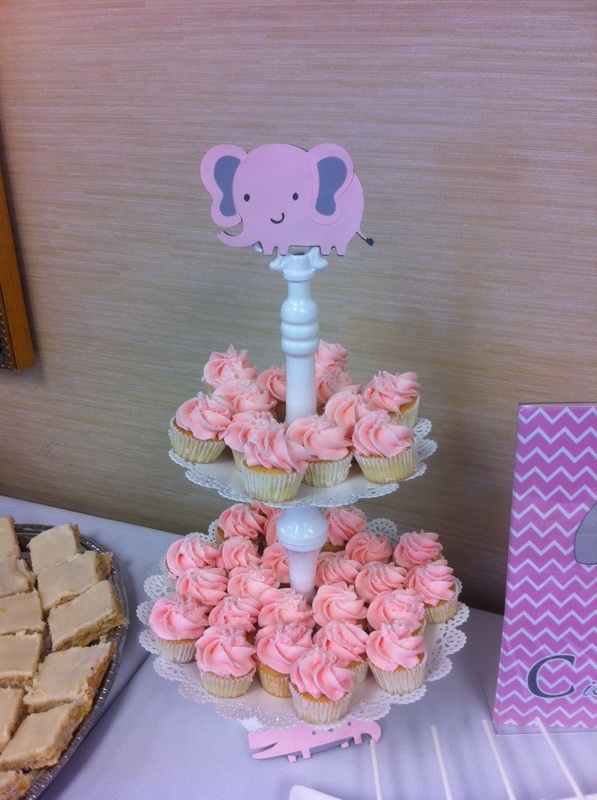
The ladies who put this baby shower together really knocked it out of the park. The colors and theme were super cute, and the sweets table was to die for. Perfect pink, gray and white sugar-sanded cake pops, homemade scones served with jam and cream, homemade swirly white-and-pink candy bark and candy-coated pretzels, and the biggest, sweetest white-chocolate-covered strawberries you have ever seen. The Hershey's Kisses even had "It's A Girl" paper strips!
While Leslee and Darren have a few months of new-baby insanity coming their way, they are also surrounded by amazing people who will love and support them through both the chaos and the fun, and beyond.
An early congratulations to you both! Get ready to hang on and enjoy the ride!
While Leslee and Darren have a few months of new-baby insanity coming their way, they are also surrounded by amazing people who will love and support them through both the chaos and the fun, and beyond.
An early congratulations to you both! Get ready to hang on and enjoy the ride!
 RSS Feed